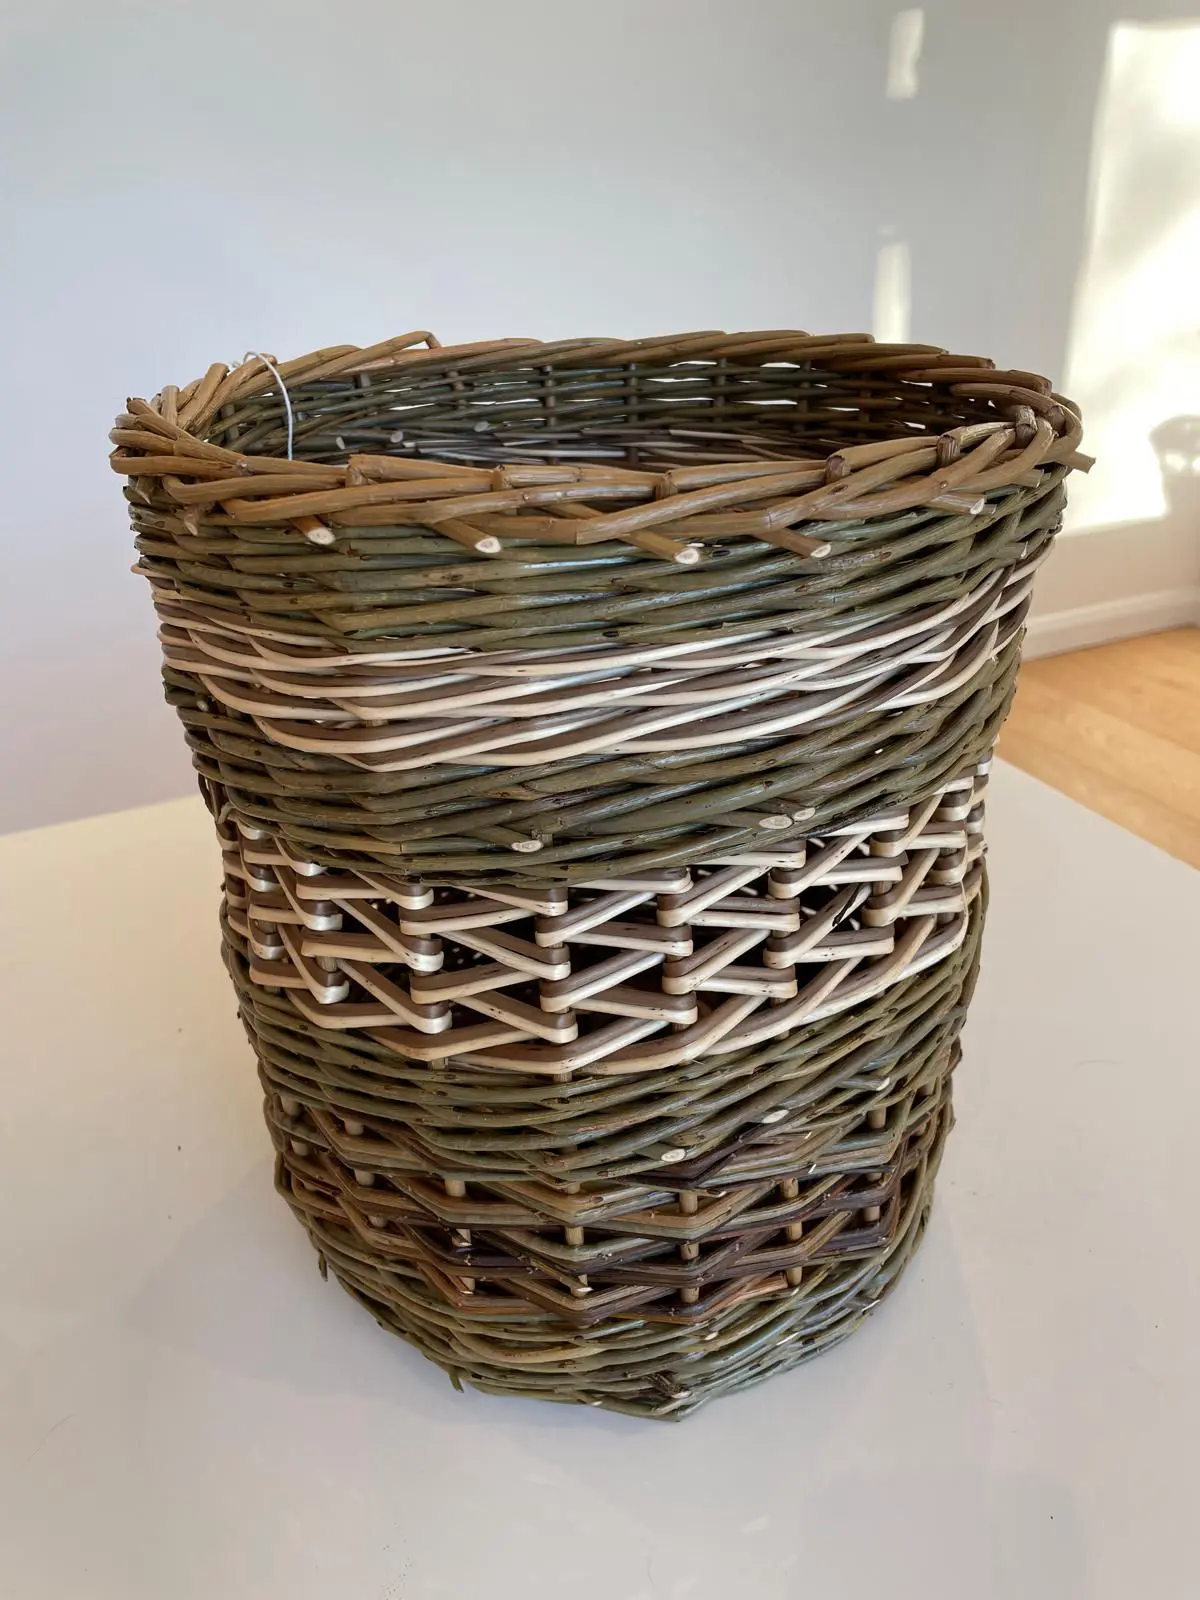
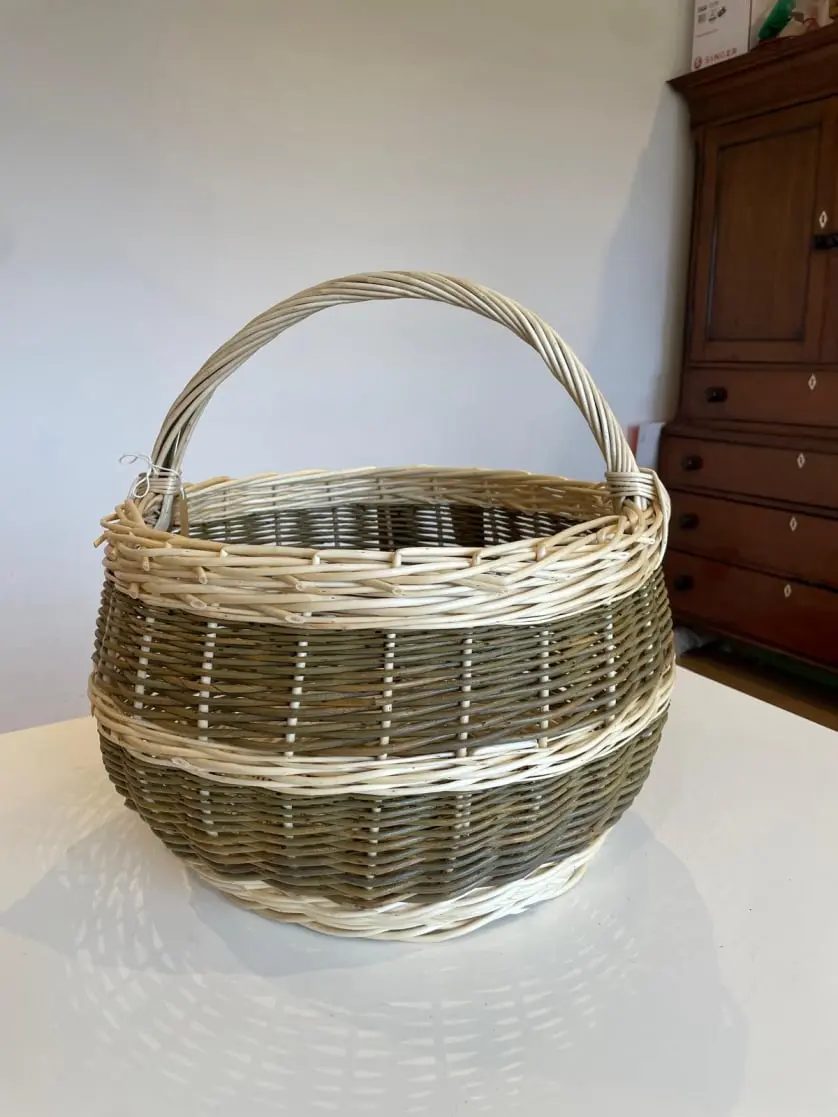
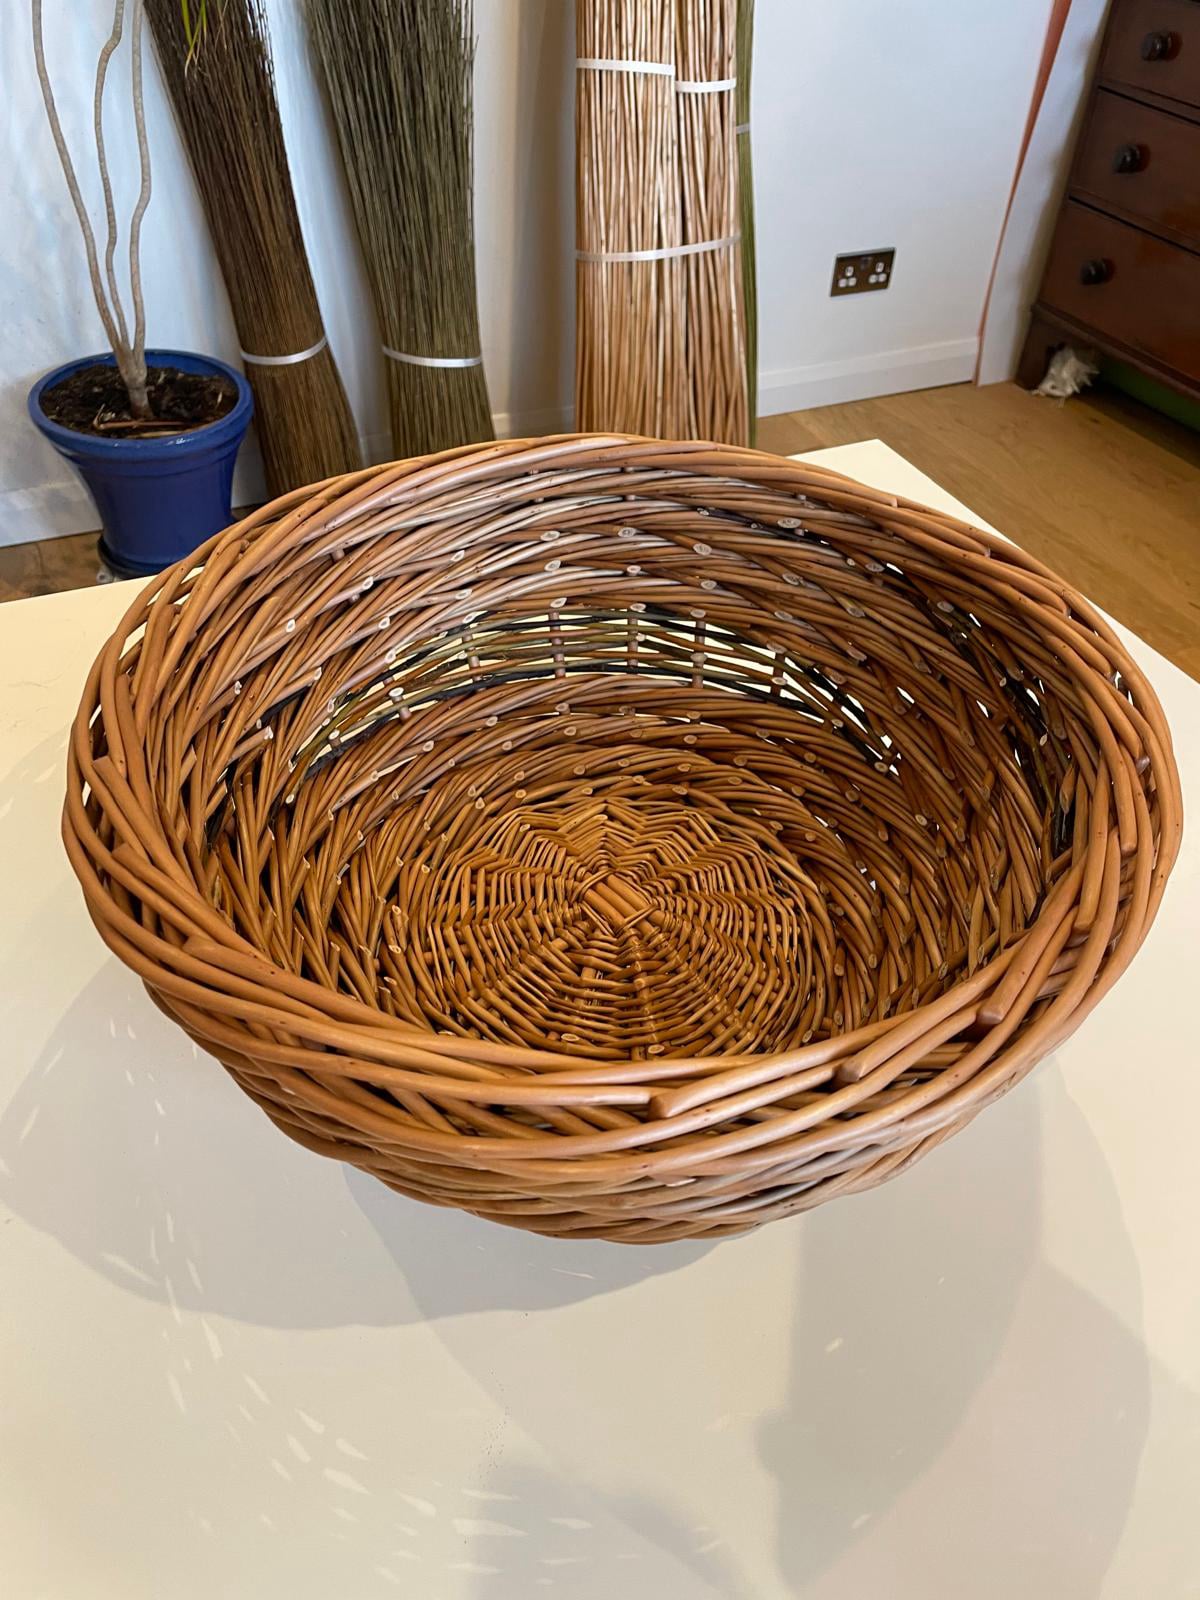
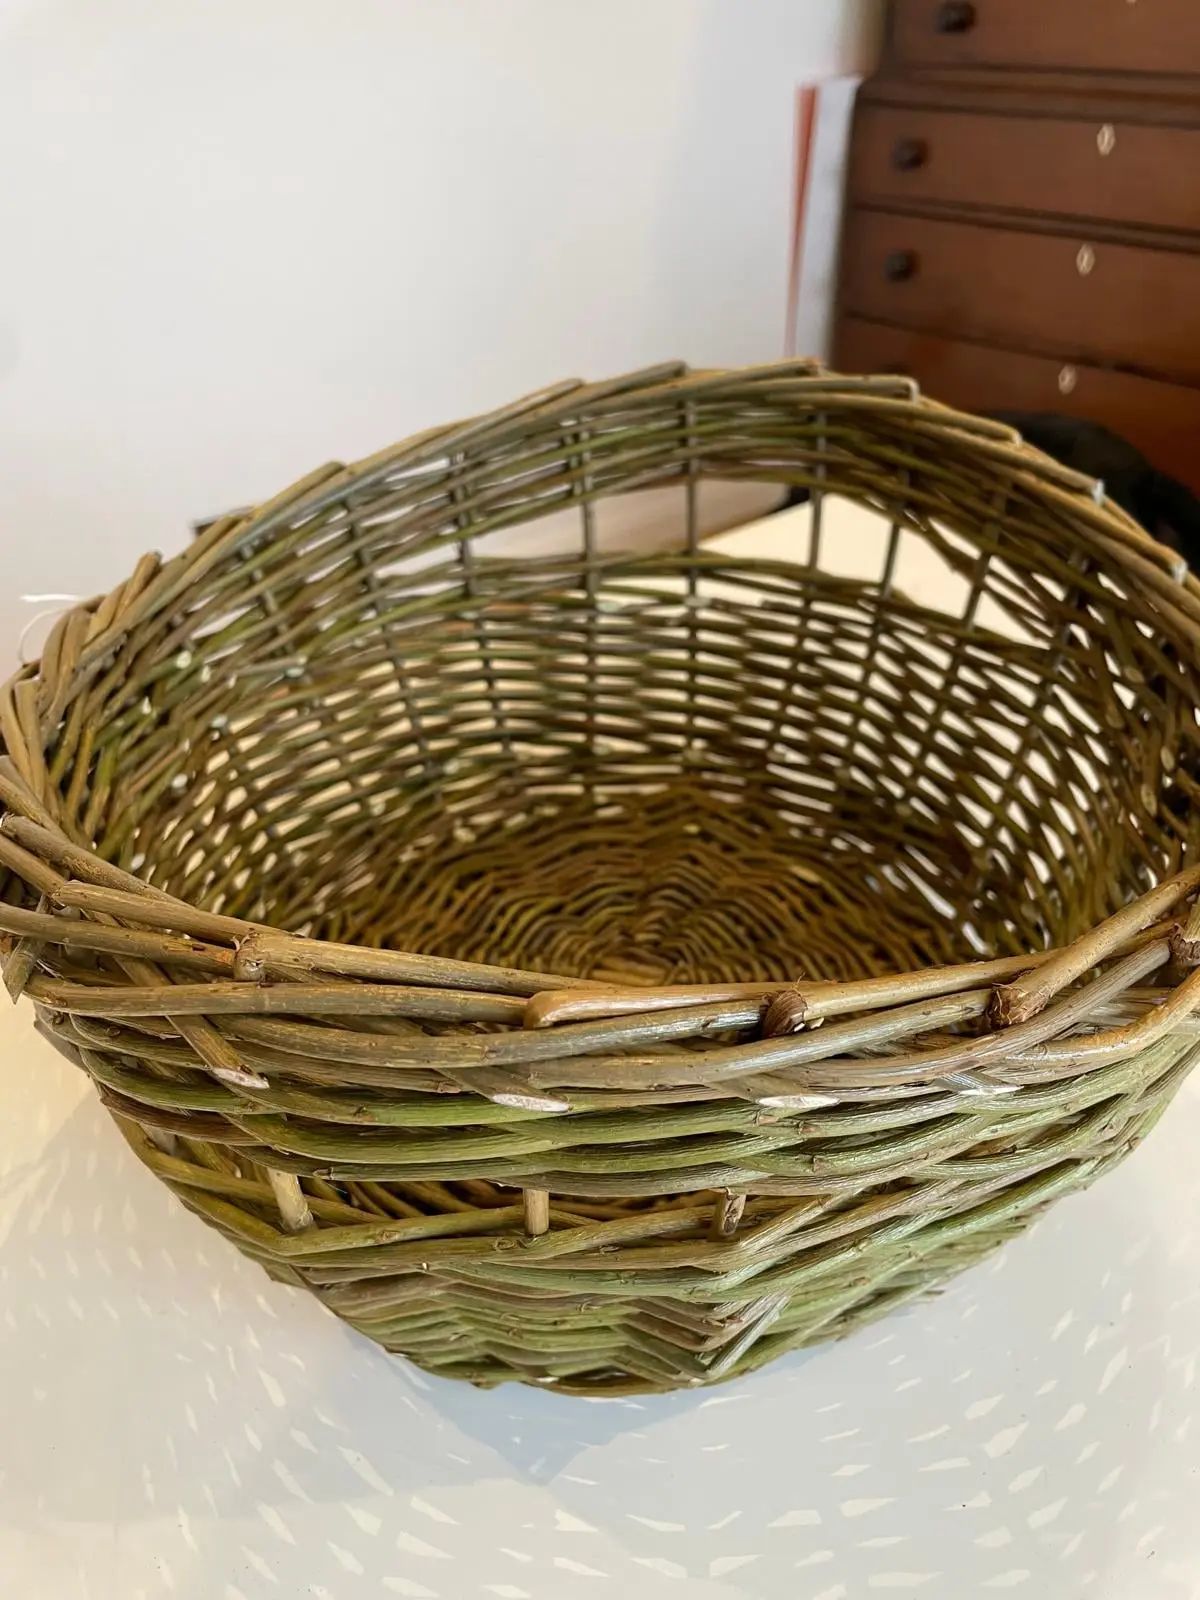
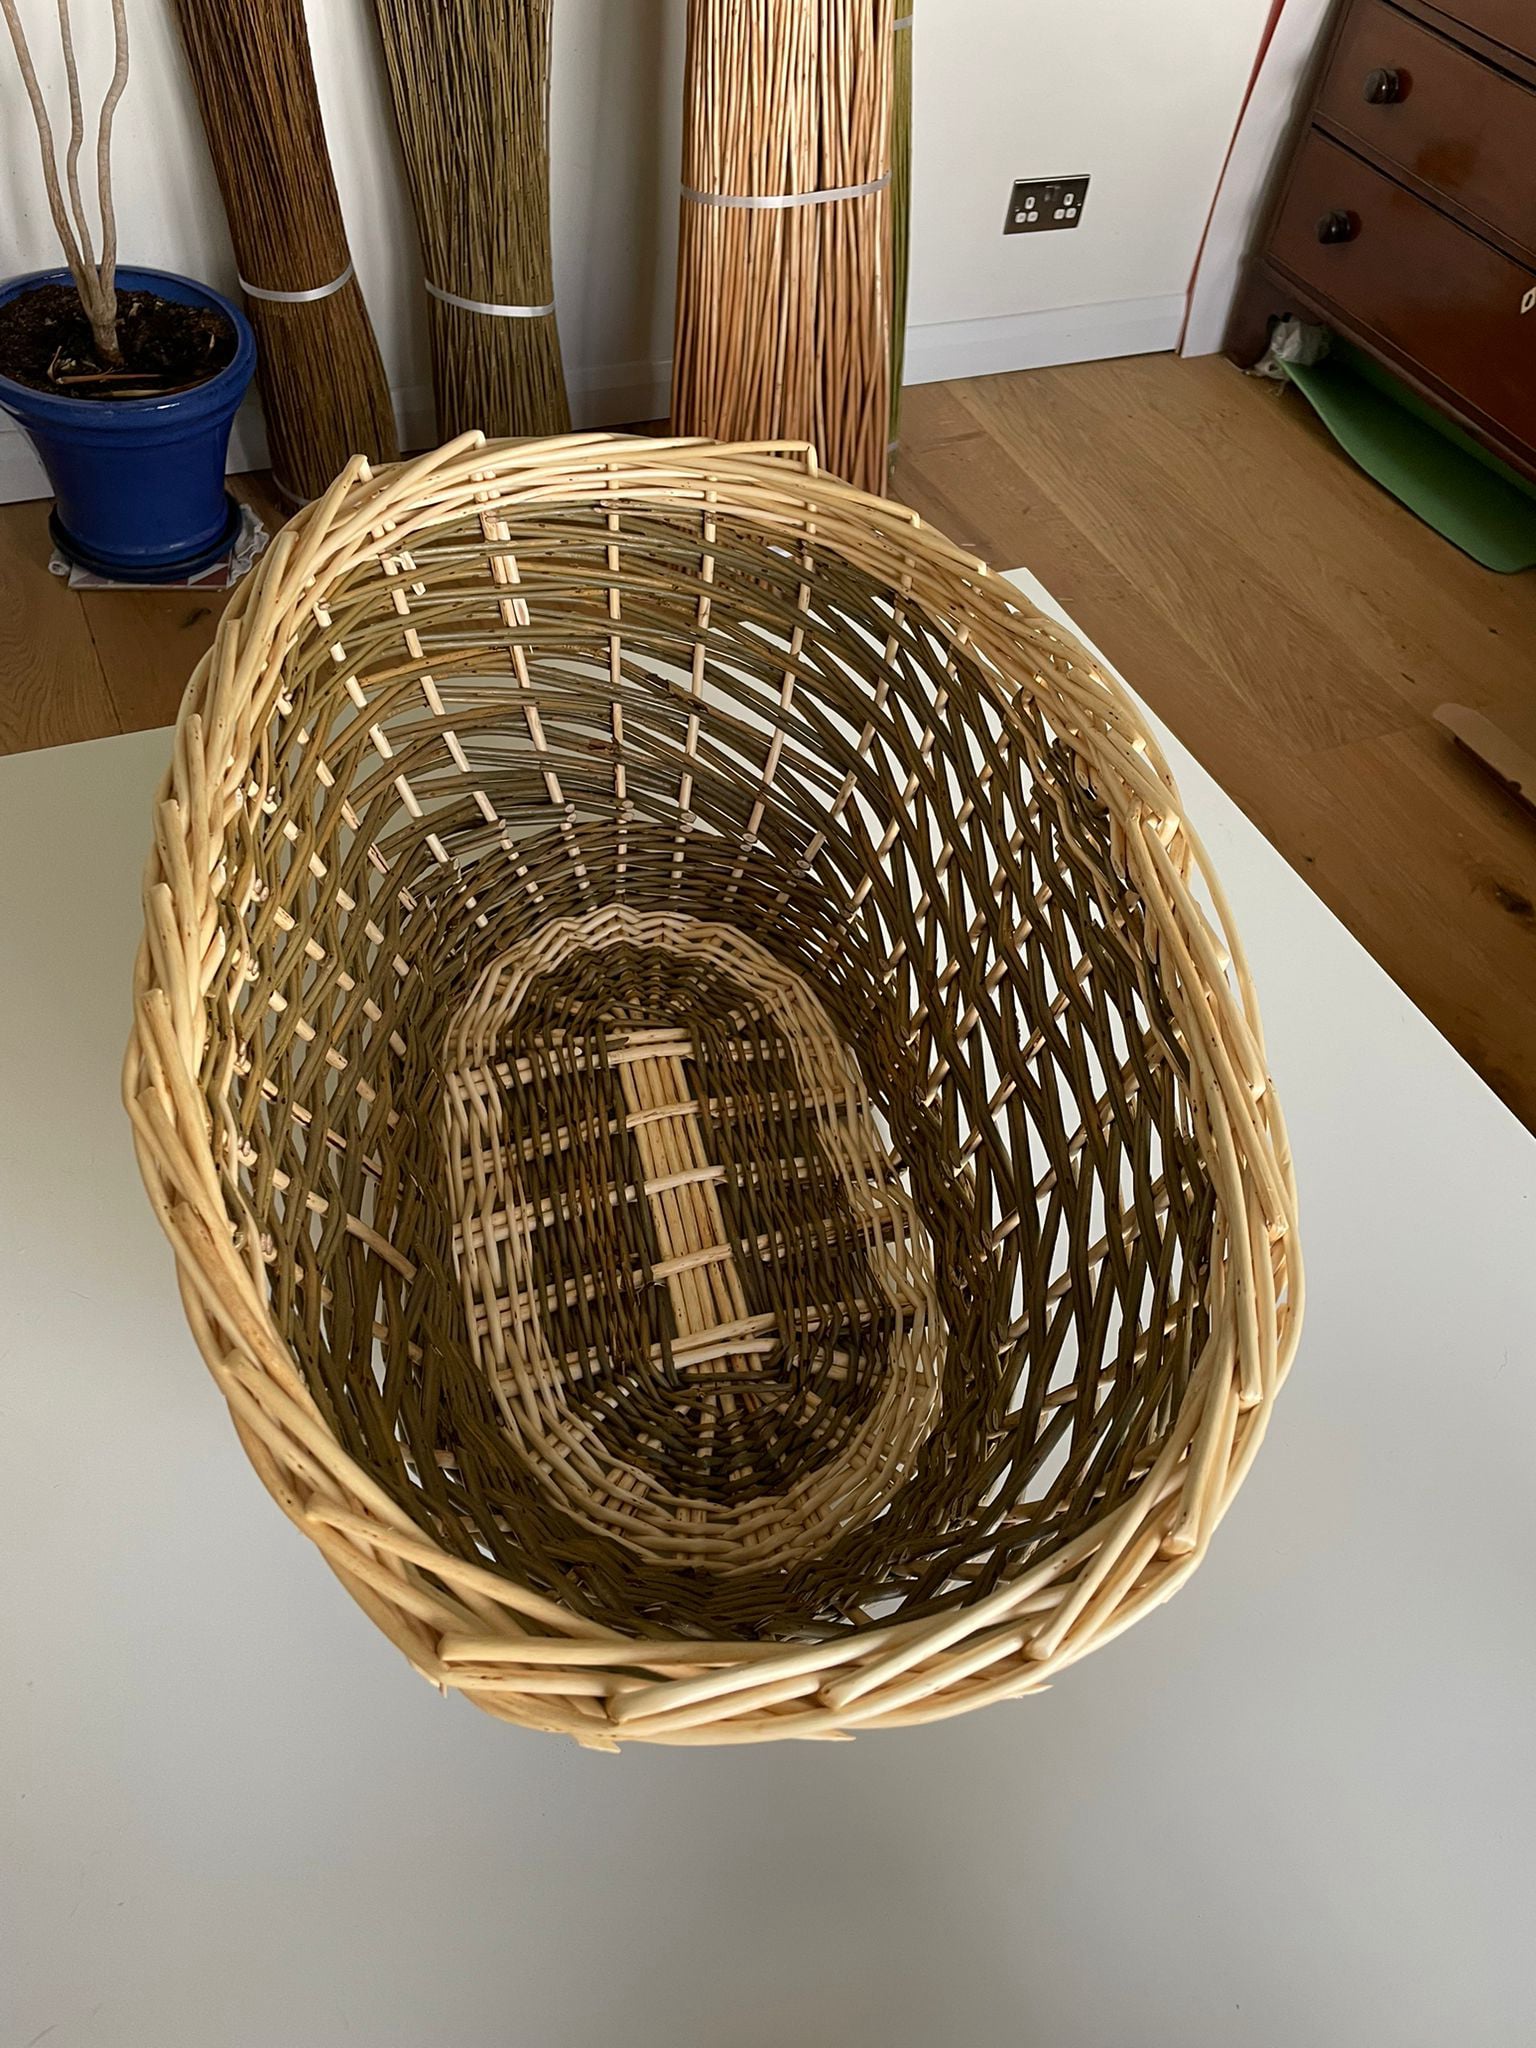
The sampler basket was to have straight sides and showcase four weaves, which are (bottom to top).
My first basket! So cute. This is in a three-rod wale right the way up with Gill Jones' pro-looking white stripe. The aim was for an inward flow to the basket shape. I was pleased with this as a first basket.
Materials:
Learning points are:
- Think about colour in advance, I was kind of changing with no end plan an I wished I'd got a block of colour between the bands.
- There are few sections where I forgot how to count to two and kept going over three for the waling.
The second basket. This one aimed to have an outward flow. I like the colours of this one and put more forethought into how I wanted the end result and colours to look. I based them on the bullseye base.
Materials:
Learning points:
- Read the instructions all the way through! Pretty sure I used to get that comment from teachers in school. I didn't put the void handle on, but made another so was good practice,
I decided to do a bit of a practice basket at home with no particular design in mind, just to try out some new weaves. It's a bit scrapy but was a great exercise to get back into things and warm up the weaving muscle before the sampler basket class.
Materials:
Stakes: Dicky meadows 5ft
Weavers: Black maul 4ft for three-rod wale at bottom, three rod slew, three rod wale, fitching, three rod wale.
Learning points:
- Put the bye-stakes in for fitching! Also make sure to twist together not one over the other.
- Have a loose basket plan in mind.
I saw tutor Gill's round belly shopper and loved it. I was really pleased with this basket up until messing up the border (see borders and handles page here). I used 5ft chunky material for this basket and think it gives a good effect. I like the much simpler use of colour, makes if much more striking.
Materials:
Stakes and waling: white willow 5ft
French randing: Dicky meadows 5ft
I made this after the round belly shopper and tried to reproduce the round belly shape to make sure I could. I managed and am also pleased with this basket (let's not talk about the border - you can read about that here).
Materials:
Stakes and waling: 5ft white willow
Double French Rand: 4ft Old French
Learning points:
- French rand could have done with more wrapping down on top of the waling to tighten it up a bit.
- Be more careful selecting weaves for French randing so they are a similar length as I had a shortie and it was stressful thinking I wouldn't get the height I wanted.
Wanted to try a rope weave but didn't have instructions. Did it intuitively using all the scraps from the kindling and shopper baskets. It's a cute little basket and I love the colours.
Materials:
Stakes: Old French
Three rod wale: Old french
Rope weave: Old French, Dicky meadows, white willow.
Learning points:
- Find out how to do rope weave properly (adding one weaver at a time).
- Use right sized weavers for the weave and basket.
Made this in the handle classes. Wanted to have a go with rope with under instruction but started before the instructions (fairly typical of me). I thought I could use up my remaining soaked material from the sampler and shoppers but it was too long.
Materials:
Stakes: Buff noir
Three rod wale: Buff noir
Rope weave: Dicky meadows 5ft trimmed down, Old French and Black Maul 4ft trimmed down, white willow 5ft trimmed/ left over trimmings down, Norbury and Old French 2-3ft.
Learning points:
- Use right size, smaller material (2-3ft was right for this)
- Put a new weaver in and drop one each stroke (otherwise you get holes)
- Use thick uprights as it's a strong weave
I needed to make a basket with a void handle. I was intending to make this into a shopper with straight sides and outward flow but I have to admit, I fell out of love with this basket half way through, so turned it into a bread basket with void handles.
Materials:
Stakes: Dicky meadows 5ft
Three-rod wale and French randing: Black French 4ft
Learning points:
- Make sure side stakes are thick enough - despite being a foot longer the Dicky meadows they were a similar thickness, which made it hard to control the weave.
- Concentrate on the spacing and flow of the stakes so that the handles are more level (one skinny side stake has warped one of the handles ).
- Having said about the stakes being to thin, it was the material I had so I worked with it and it is still a functional basket.
This was an in between classes mini basket for my son Freddie, as he is right into the basket making. I also wanted to have a go with English randing. This used alternative colour willow, which has produced a lovely colour effect.
Materials:
Stakes: white willow 5ft
Weavers: Black maul 4ft
Learning point:
- Side stakes and weavers were too similar in this basket as well. Has resulted in the weavers pushing the stake in and making the shape flat, especially with the alternative material as the white was stronger and has ended up layered onto the same weak stakes.
- You can't see the pattern of the English randing with the alternative material but that's a trade off as the end result is quite striking.
This is an oval shopper done on a French style oval base. When staking up it used a 'galleon' style upset that was quite fun working with and trying to keep the shape. This used a 2 strand French rand that
Materials:
Stakes: white will 5ft
Walers and weavers: Dickie meadows 5ft
Learning points:
- I missed out two lots of weavers when starting off the French randing. I picked up one set which I fixed with Gill but then only realised I'd missed another set when picking off the basket about two months later. This might explain why I felt like it was super challenging.
- I still managed to get a nice oval shape even with my missing weavers
- This was my first go at packing and I got a neat little section of packing in on either side when the handle would go
This was done on a Catalan base using a frame made around a former in a previous class. The former work was great to learn and I'm considering bringing it into my final piece for the Innovative unit.
Materials:
4/ 5ft buff - this basket was using material that had been previously soaked and dried once or twice and was beginning to get a but splitty when worked.
Learning points:
- I didn't listen to Gill's recommendation on what will to use for the base and therefore side stakes as it had been getting a bit splitty and I didn't trust it. However, that meant I used the 4ft buff and I had to replace every single side stake, some barely made it high enough to get the wale on. Listen to Gill's good advice!
- I wasn't loving this basket until I started to do the packing and it felt like a mini Moses basket was forming. I decided to just go with it as I still met the criteria for the unit with the packing and leather strap handles. I was much happier with the result even though it was supposed to be a shopper.
I love rope weave, there's just something about it. I would have liked to made this out of lots of varieties of brown willows but was running a conference in Scotland the week before when all of the soaking needed to happen so ended up using buff and some nice colourful willows for packing that were thin enough to get soaked in time.
Materials:
Stakes and weavers: 5 ft and 4ft buff
Packing: mixed varieties 3ft and 4ft
Learning points:
- I really enjoyed making this basket. It flowed well and I've tried rope weave before but using a over 2 3 rod wale and this was using an over 3 behind 2 wale - it was a lot easier with the extra length in the weave.
- Although I would like to make another basket like this in lots of lovely colours, the buff really shows the texture of the weave and the packing gives a bit of colour interest.
- I'd have put in larger areas of packing if I did this again.
- Overall pleased with the basket.